Professional solutions on concrete addtives, Concrete Foaming Agent, Superplasticizer, CLC Blocks Additives, and foaming machine

The One Mistake 7 in 10 DIYers Make with Refractory Cement (And How It Dooms Your Project)
Here’s a number that should give every builder and restorer pause: industry surveys suggest that nearly 70% of premature failures in home-built kilns and repaired fireplaces aren’t due to the quality of firebrick or design flaws. The culprit is almost always the refractory cement for fireplace and kiln, applied with a fundamental misunderstanding of what it is and how it needs to behave under extreme stress. The chasm between a hearth that lasts for decades and one that crumbles after the first serious burn often comes down to a series of small, seemingly innocuous choices. I’ve spent over twenty years witnessing these mistakes in the field, and I’m here to guide you away from them. This isn’t just about technique; it’s about understanding a material that thinks and reacts. Let’s walk through this carefully.
The Crucial Mindset Shift: This is Not Mortar
Your first, and perhaps most critical, step is a mental one. If you pick up a bag of refractory cement and think of it as ‘extra-strong mortar,’ you’ve already laid the groundwork for failure. Standard mortar is about bonding and compressive strength. Refractory cement is an engineered thermal system. Its job is to maintain integrity while absorbing massive heat, expanding and contracting at a rate compatible with your firebrick, and insulating the structure behind it. I once inspected a beautiful outdoor pizza oven that had a catastrophic crack after its maiden firing. The builder, a skilled mason, had used a standard mortar mix, reasoning it had held up in chimneys. He failed to account for thermal shock. The entire arch failed. The core properties you must respect are threefold: heat resistance (the maximum temperature it can endure without melting or deforming), thermal shock resistance (its ability to withstand rapid temperature swings without cracking), and its insulating value (which protects your outer shell). Ignore any one of these, and your project is on borrowed time.
Selection: Where the Wrong Choice Locks in Failure
The marketplace can be confusing. Castables, mortars, patching cements. The single most decisive factor is the maximum service temperature, and you must choose a product rated for at least 100-200°F above your intended operating temperature. For a wood-burning fireplace, a 2000°F rated cement is a minimum. For a pottery kiln aiming for cone 6 (around 2200°F), you need a 2500°F or higher product. Next, look at the alumina (Al2O3) content. As a general rule, higher alumina content means higher heat resistance and strength. A 40-50% alumina castable is a robust choice for many kilns, while a lower-alumina mortar might suffice for fireplace brick joints. My strong, opinionated advice for DIYers: avoid pre-mixed, tubed ‘refractory’ products for any structural or high-heat application. They are convenient for tiny gaps but lack the density and formulation for real duty. Choose a dry, hydraulic-setting refractory cement that cures by chemical reaction, not just air drying. This gives you control and ensures a proper set.
The Silent Killers: Preparation and Mixing
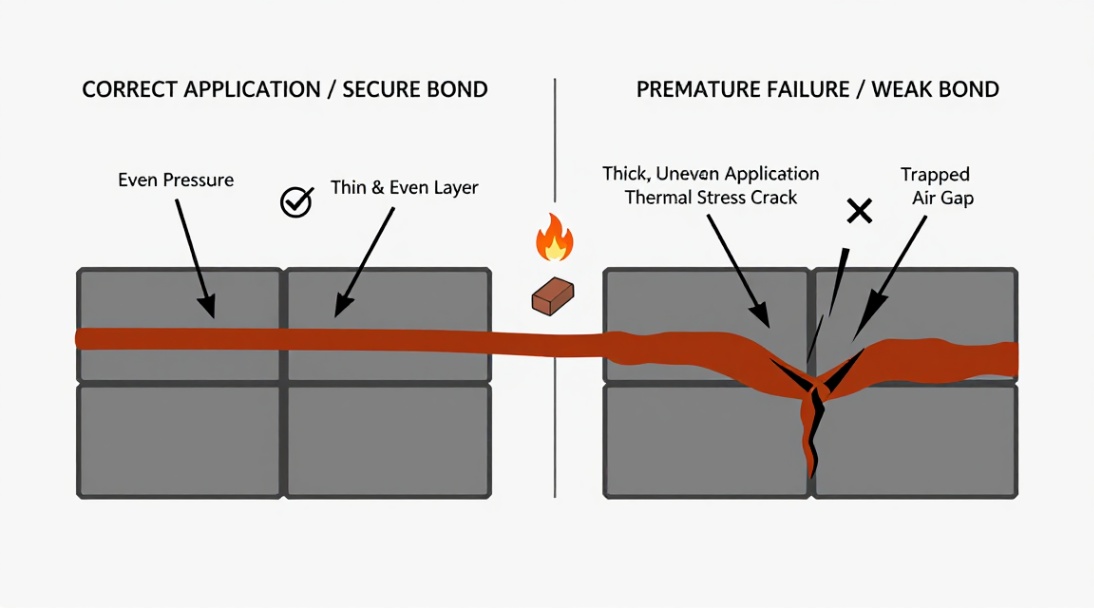
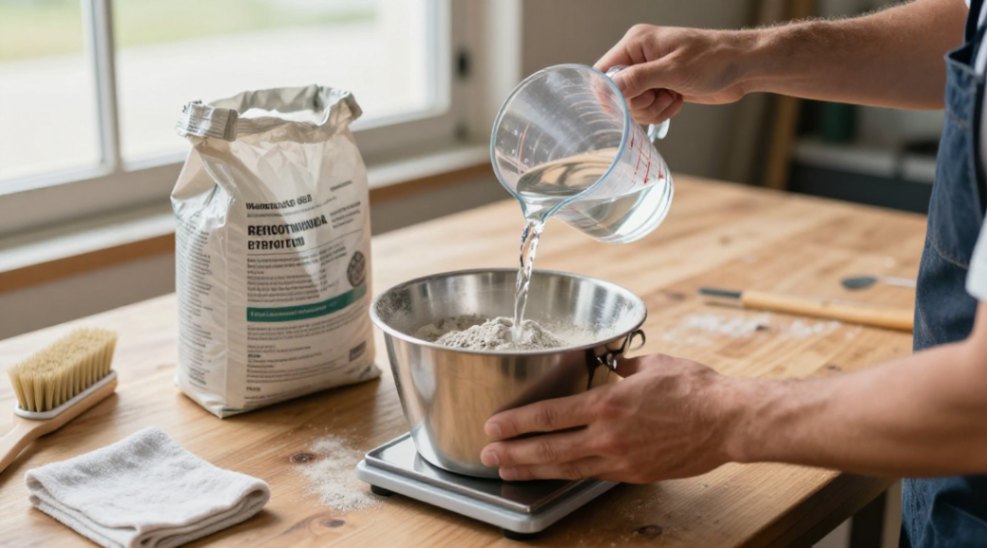
This is where most weekend projects go off the rails. The substrate must be utterly clean, free of dust, old mortar, and, critically, any oily residue. I use a wire brush followed by a vacuum and a wipe with a damp cloth. Any contamination creates a weak boundary layer. Now, mixing. This is a precise science, not an approximation. The ratio of powder to water is sacrosanct. Exceeding the manufacturer’s recommended water amount by even a small margin is the most common error I see. It drastically reduces strength, increases shrinkage, and guarantees cracks. Add water to the powder slowly, mixing thoroughly to achieve a consistency often described as ‘stiff but workable’-like firm peanut butter. It should hold its shape on a trowel. If it’s soupy or slides off easily, you’ve added too much water. Scrap the batch and start over. It’s cheaper than a rebuild.
| Phase | Key Action | Precise Specification / Warning |
|---|---|---|
| 1. Selection | Choose by Max Temperature & Alumina Content | Select cement rated ≥100-200°F above intended use. For kilns, aim for 40%+ Al2O3. |
| 2. Preparation | Surface Cleaning | Brush, vacuum, and damp-wipe all bonding surfaces. No dust, no grease. |
| 3. Mixing | Water-to-Powder Ratio | Follow manufacturer’s ratio exactly. Mix to a ‘stiff peanut butter’ consistency. Too much water ruins integrity. |
| 4. Application | Brick Laying & Coating | Butter bricks fully. Keep joints under 1/4″. For coatings, apply in layers no thicker than 1/2″. |
| 5. Curing | Chemical Set & Air Drying | Keep damp (cover with plastic) for 24 hrs. Then air dry slowly for 24-48 hrs minimum. |
| 6. Firing | Initial Heat-Up | Ramp temperature slowly over many hours. Do NOT subject to full heat immediately. |
Application and the Patient Art of Curing
When laying firebrick, ‘butter’ both the end of the brick and the brick it will meet. Aim for joints no thicker than 1/4 inch. Thicker joints shrink more and become weak points. For coating a surface, like the interior of a forge, apply it in layers no more than 1/2 inch thick, scoring the surface of the first layer before applying the next to ensure a mechanical bond. Now, the part that tests everyone’s patience: curing. Do not, under any circumstances, rush this. Curing is not drying. Curing is the chemical process where the cement gains strength. After application, you must keep it moist for typically 24 hours-mist it lightly and cover it with plastic sheeting. Then, and only then, begins the air-drying process. This needs to be slow. Allow at least 24-48 hours of ambient drying before even thinking about applying heat. I’ve seen beautiful linings spider-web with cracks because someone lit a small ‘test fire’ after just one day.
The First Firing: The Moment of Truth
The initial firing is not the time for a celebratory bonfire. You must drive out the remaining physical moisture from the cement slowly and carefully. A standard industry practice is to follow a schedule like this: raise the temperature to 212°F (100°C) and hold it there for several hours to drive off free water. Then, increase gradually to around 500°F (260°C) to remove chemically bound water. This entire process might take 8-12 hours or more for a small kiln. Going too fast traps steam inside, creating pressure that will spall or crack the cement from within. It’s a quiet, gentle bake, not a blast furnace. Treat this step with reverence.
Your Path Forward: Observation and Trust
After your successful first firing, your job becomes one of observation. Inspect the refractory cement for fireplace and kiln seals before each use. Look for new hairline cracks (some small ones are normal), spalling, or crumbling. These are your early warning systems. Remember, this material is a partner in your craft. You now understand its language-the importance of selection, the precision of mixing, the patience of curing, the respect of the first fire. You’ve avoided the pitfalls that claim the majority of projects. That knowledge is your most valuable tool. Go build something that endures.
We are the global leader in lightweight concrete and advanced engineered foam solutions. Known globally for its commitment to research, innovation, and applied expertise, we have been providing engineered foam solutions since the early 2012’s.
We can supply high-quality concrete admixture and foam concrete related products all over the world.
The company has a professional technical department and quality supervision department, a well-equipped laboratory, and equipped with advanced testing equipment and after-sales customer service center.
If you are interested, please feel free and contact us.