Professional solutions on concrete addtives, Concrete Foaming Agent, Superplasticizer, CLC Blocks Additives, and foaming machine

A Masterclass in Foamed Concrete Mix Design for Durable, Level Floor Screeds
The Foundation of a Flawless Floor
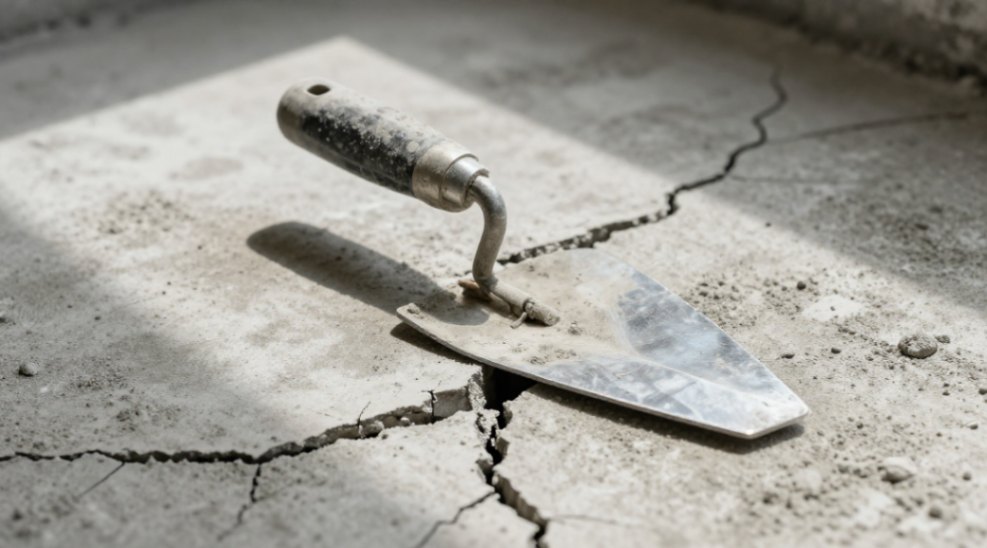
Have you ever inspected a floor screed only to find surface cracks snaking across it weeks later, or worse, detected a hollow, drum-like sound when tapping the surface? The sinking feeling of a failed substrate is all too familiar. Often, the root cause isn’t poor workmanship on site, but a flawed foundation conceived in the lab: the foamed concrete mix design for floor screeding. A mix that is too wet collapses under its own weight, losing its insulating bubbles. A mix that is too dry shrinks violently, tearing itself apart as it cures. For over twenty years, I’ve diagnosed these failures. The solution is not guesswork. It’s a disciplined, sequential process of foamed concrete mix design for floor screeding that balances fluidity with stability, and lightness with strength. Let’s walk through that process.
Defining the Goal: Density as Your Compass
Every successful foamed concrete mix design begins with a single, non-negotiable parameter: the target plastic density, measured in kilograms per cubic metre (kg/m³). This figure is your compass. It dictates everything. For internal floor screeding, densities typically range from 800 kg/m³ to 1400 kg/m³. A 1000 kg/m³ screed offers excellent thermal insulation and drastic weight reduction-often 50% lighter than traditional sand-cement screeds. A 1300 kg/m³ mix provides higher compressive strength for more demanding applications. You must choose based on the structural load and thermal performance required. This target density is the absolute benchmark against which you will measure every batch.
The Anatomy of the Mix: Core Components and Ratios
With your density target set, you assemble the cast. The primary actors are cement, water, fine sand, and pre-formed foam. Their proportions are critical. The cement provides the strength. A common starting point for a robust floor screed is a sand-to-cement ratio by weight of 2:1 to 3:1. The sand must be dry and uniformly graded; damp sand will throw your entire water calculation into chaos. The water-cement ratio (w/c) is the maestro of workability and strength. For foamed concrete, I maintain a w/c between 0.45 and 0.55. Exceed 0.55, and you risk segregation and foam collapse. Drop below 0.45, and the mix becomes unworkable, leading to poor compaction and high plastic shrinkage. The foam is the variable. It introduces the air. The volume of foam you inject directly controls the final density. A high-quality, protein-based foam agent, diluted and aerated through a precision foam generator, produces stable, resilient bubbles that must survive mixing and pouring.
The Step-by-Step Design and Trial Process
This is where theory meets the mixer. Follow these steps precisely.
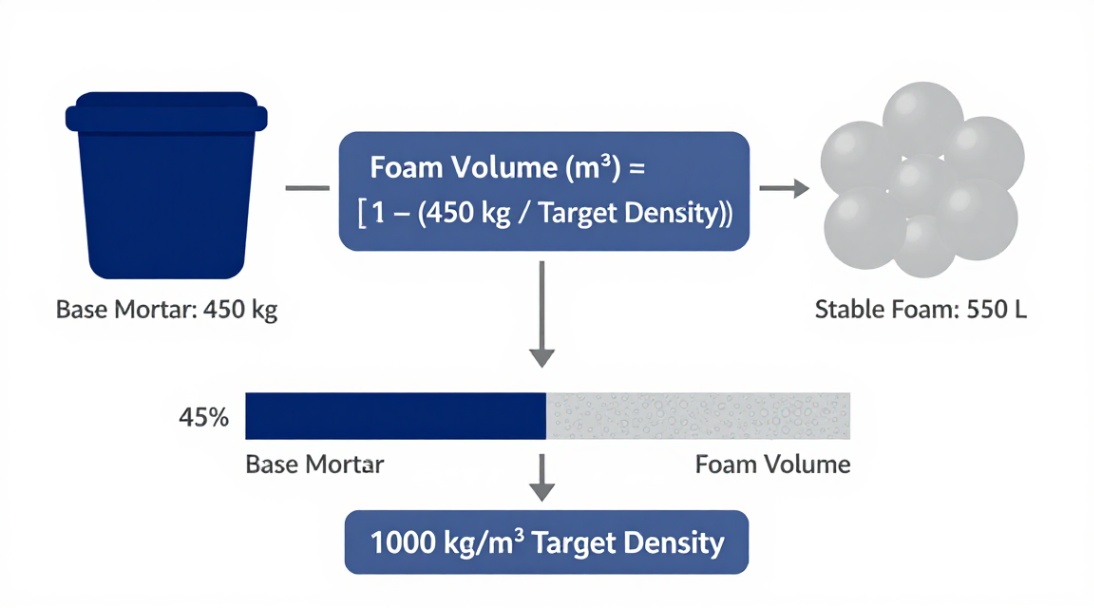
1. Calculate the Base Mortar Weight. First, determine the weight of your cement, sand, and water for one cubic metre, ignoring air. For a 3:1 sand-cement mix with a 0.50 w/c, per 100 kg of cement, you would have 300 kg of sand and 50 kg of water. The combined weight is 450 kg/m³ for the solids and liquid.
2. Determine the Required Foam Volume. This is the pivotal calculation. Fresh foamed concrete density equals the weight of the base mortar plus the weight of the foam (which is negligible) divided by the total volume. To find the foam volume needed to hit your target density, use this principle: Foam Volume (m³) = [1 – (Base Mortar Weight / Target Density)]. If your base mortar weighs 450 kg and your target is 1000 kg/m³, you need foam to occupy 0.55 m³ of the total cubic metre volume. That’s 550 litres of stable foam.
3. Execute the Trial Batch. Never mix a full cubic metre first. Start with a 50-liter trial. Use a forced-action pan mixer. First, combine your dry cement and sand for two minutes. Then, slowly add the measured water and mix to a uniform, lump-free slurry. Now, start the foam generator. Introduce the pre-formed foam into the mixer gradually. Mix only until the foam is uniformly distributed-typically 3 to 5 minutes. Overmixing will destroy the bubble structure.
4. Test and Adjust. Immediately test the plastic density of the trial batch. Fill a container of known volume, weigh it, and calculate. If the density is 5% above your target, you need more foam. If it’s below, you need less. Adjust your foam volume calculation accordingly and run a second trial. Consistency is key. The mix should flow like a thick shaving cream, holding its shape when cut with a trowel but easily levelled.
| Step | Action | Key Parameter | Unit |
|---|---|---|---|
| 1 | Define Target Density | Plastic Density | kg/m³ |
| 2 | Establish Base Mortar | Sand:Cement Ratio, w/c Ratio | By weight |
| 3 | Calculate Foam Requirement | Foam Volume | litres/m³ |
| 4 | Trial Batch & Adjust | Measured Plastic Density | kg/m³ |
Placement, Curing, and Performance Reality
Your perfectly designed mix can still fail on site. Placement requires care. Pump or pour the material into place. Do not vibrate or overwork it. Vibrations will coalesce and collapse the foam bubbles, leading to a density gradient and weak spots. A straightedge or a dappling bar is sufficient for levelling. Then, curing begins. This is the most overlooked step. Foamed concrete has a high surface area and is prone to rapid moisture loss. You must prevent plastic shrinkage cracks. Within 20 minutes of finishing, apply a spray-applied curing membrane or cover the surface with damp hessian and polyethylene sheeting. Maintain this for at least 48 hours. Expect a 1000 kg/m³ mix to reach a walk-on strength in 2-3 days, a compressive strength suitable for most floor finishes (e.g., 7 N/mm² or more) in 28 days, and a drying time of approximately 1 day per millimetre of thickness up to 40mm, then longer thereafter. Do not rush the drying before installing moisture-sensitive finishes.
Avoiding the Common Pitfalls
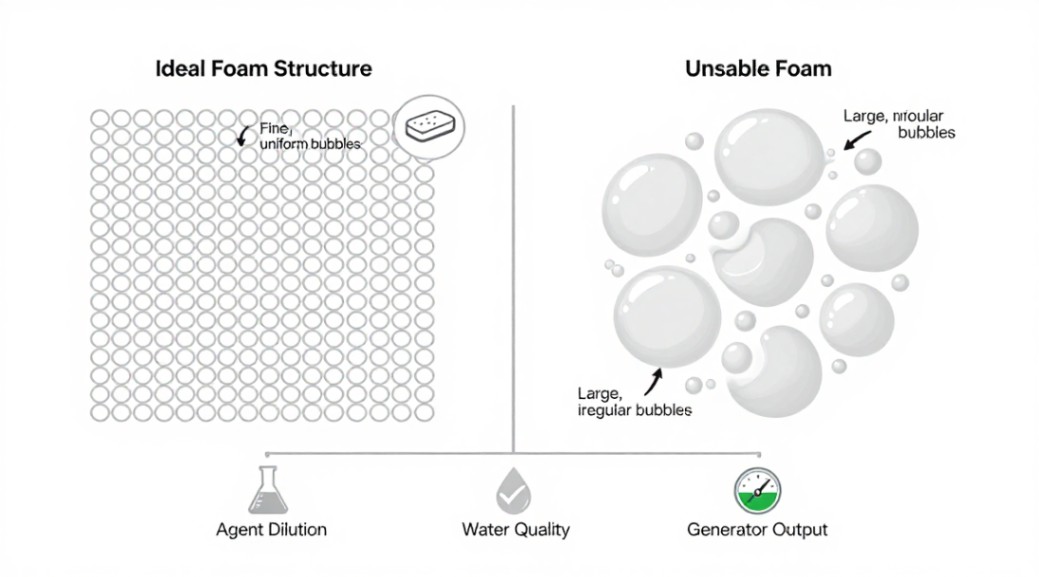
The most frequent error is foam instability. If your foam collapses during mixing, check three things: your foam agent dilution ratio, the water quality (hard water can break foam), and the output pressure of your foam generator. The foam bubbles should be fine and uniform, like soap suds, not large and glistening like bubble bath foam. Another critical error is ignoring ambient conditions. Mixing and placing in high temperatures or wind accelerates water evaporation, destabilizing the foam and causing crusting and cracking. Plan your pours for moderate conditions or take protective measures.
The Proven Path Forward
Theoretical knowledge is one thing. Applied expertise is another. A robust foamed concrete mix design for floor screeding is the only guarantee of a substrate that remains level, stable, and crack-free for the lifespan of the building. It eliminates the guesswork and the costly call-backs. If your goal is to deliver lightweight, thermally efficient, and perfectly level floors with certainty, this systematic approach is your blueprint. The process demands precision. It rewards with performance. To translate this blueprint into your next successful project, I strongly recommend consulting with a specialist supplier who can provide not just materials, but the critical foam generator technology and on-site technical support. Do not compromise on the design phase. Your reputation as a flooring expert depends on it.
We are the global leader in lightweight concrete and advanced engineered foam solutions. Known globally for its commitment to research, innovation, and applied expertise, we have been providing engineered foam solutions since the early 2012’s.
We can supply high-quality concrete admixture and foam concrete related products all over the world.
The company has a professional technical department and quality supervision department, a well-equipped laboratory, and equipped with advanced testing equipment and after-sales customer service center.
If you are interested, please feel free and contact us.